Good vapour barrier is thick. Although 6 mil poly is great for a vapour barrier, 15 mil will stand up to much more abuse on the work site. Being thicker also makes it harder to work with, especially in corners. I have always fumbled over vapour barriers in corners and came up with an inside fold that looks much like the corner fold for wrapping paper on a box. This allows the vapour barrier to stand vertically in the corner and then follows the shape of the corner. Although it looks nicer than just letting the flow of concrete determine how it folds you end up with a vertical piece of vapour barrier (Photo 1-1)
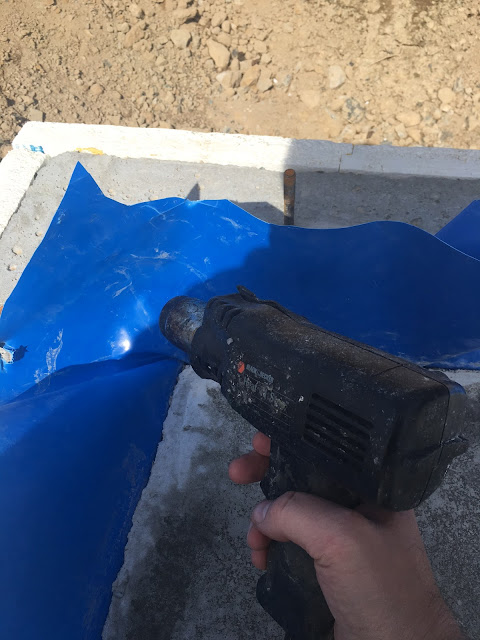
One of the construction details requires the vapour barrier to be pulled out over the top of the stem wall where the weight of the stud wall will keep it in place. Blueskin will then be taped to the interior OSB and sealed to the vapour barrier using the self adhered backing and acoustical sealant. Leaving the framers to drop the wall onto the vapour barrier and having a messy corner to seal would be a bit of an inconvenience so I decided to try something to deal with the vapour barrier. I have seen builders cut a slit at the corner to ease the transition of the vapour barrier over the top of the foundation but I didn't like this solution since it would be a mess to air seal properly. I decided to try a heat gun! I heated the corner slowly. I started at the base near the concrete and move upwards and outwards from the corner knowing that the vapour barrier at the top edge would have to stretch more than the barrier at the corner. After 30 s the barrier became softer and had a slight translucence (Photo 2-1, 2-2). At this point I turned of the gun, and with my work gloves on, I used hand pressure to slowly push the vapour barrier downwards and outwards in the direction of the corner and held it in place for 10 s - 20 s to wait for it to cool down. Photo 3-1 is the final result.
It will be much easier to work with when it comes time to air seal this to the OSB air barrier on the inside of the house. Some Blueskin and acoustical sealant will make this an easy job now that it rests flat.

Photo 1-1 Vertical corner of vapour barrier.

Photo 2-1 Heating slowly with a heat gun while working back and forth and up and down.

Photo 2-2. The barrier starts to get soft and pliable.

Photo 3-1. Working with gloves and pushing the vapour barrier downwards and outwards stretches the barrier and now it sits fairly flat.
Comments
Post a Comment