
Framing Complete!


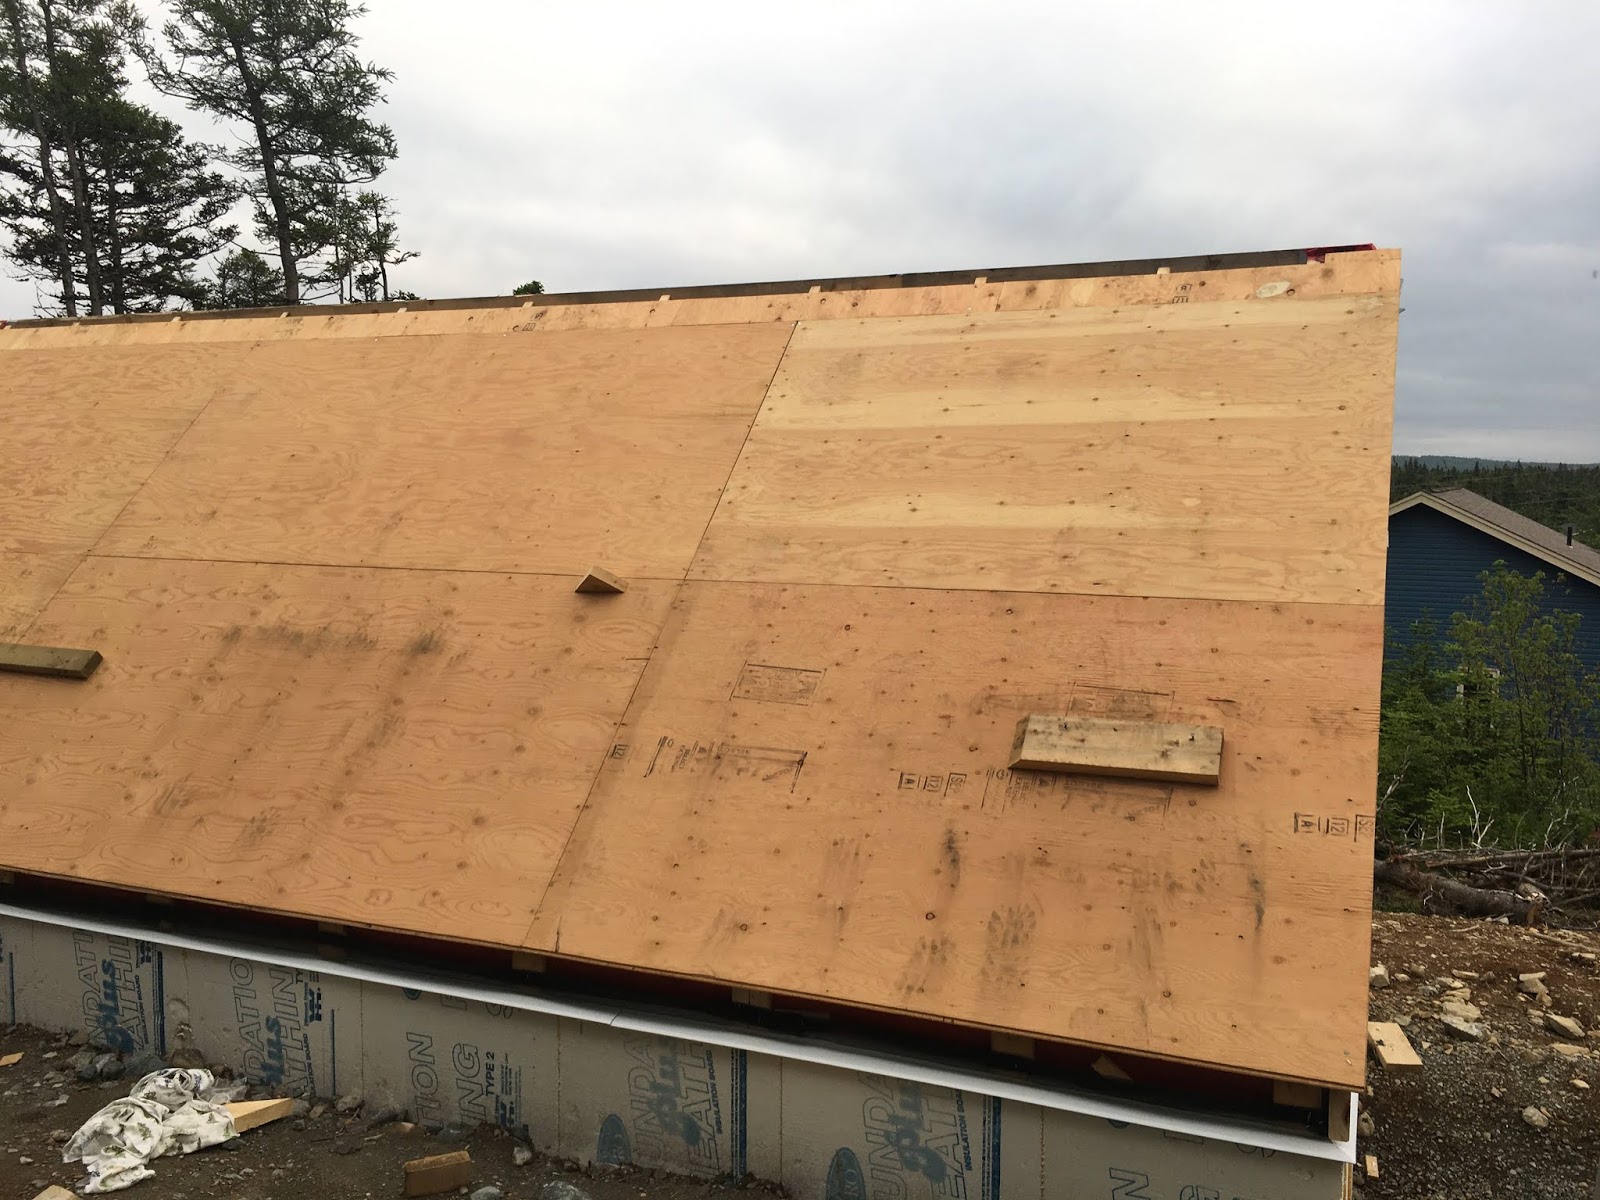
At the end of the last blog entry I was at a point where the main knee wall was complete and I have started framing the end walls.  Most of the framing details where fairly easy to complete although I had never framed and squared a building with a knee wall before.  There were some minor setbacks getting everything squared up but once that was completed, framing moved ahead quickly.  I had originally designed the building for trusses with gusset plates but realized that each truss was going to be more than I could handle on my own so decided on common rafters and a ridge board instead.  In order to place the ridge board I made sure to frame a pocket with enough space so we could lift and drop the ridge board down in place.  This complicated the design since the ridge board would now be part of the air barrier in the building.  Some attention to detail was required using similar methods that were completed during our house construction.  The ridge was supported with a post that sits on concrete pad below. Various pieces of vapour barrier can be seen hanging on the structure in order to provide continuity to the vapour barrier once it is installed at the inside.  Common rafters went up one by one and attached to the ridge board using various strong tie screws and connectors.  The pictures illustrate places where 3m tape has been used.  At the exterior, the tape and acoustical sealant provide anan air barrier at the exterior sheathing.  The 3m tape along the glazing sills will be used to seal the twin wall polycarbonate.  Sheeting the roof was super easy with the earth berm at the north side.  Most sheets could be pushed up the rafters from the ground and then nailed while standing on the roof.  Framing was mostly complete after a couple of weeks.  The weather was fairly cold up until the middle of July making it a real task to want to be outside!




Comments

  1. This is very inspiring. I look forward to more updates.

    ReplyDelete
  2. Great looking project. I like your use of 2 by 8 studs. I have been building a passive energy efficient home in Aquaforte, Southern Shore of NL since 2016. I'm still figuring out the passiveair exchange system. I'd love to see your project in person. I'm a PhD I-O psychologist, but have been involved with passive homes since 1980 when I completed my carpentry apprenticeship and R2000 was just starting up. Earon Ed Kavanagh - Please get in touch - earonkavanagh@gmail.com

    ReplyDelete
    Replies
    1. looks like I'm pretty late on this reply! sorry!

      Delete

Post a Comment

Popular posts from this blog

Building the Air Tight Barrier: Door Flashing Details.

It took us a while to wrap our heads around the door details on my plans.  The main exterior wall is composed of 2x8s.  The rough stud opening was substantially larger than the door.  Because the walls are much deeper than a standard door frame for a 2x6 wall, the interior of the 2x8 opening was studded with double 2x4s.   Outside of these 2x4s, there is 1.5" of foam and another 2x4 on face which brings the door frame opening flush to the exterior 3" of EPS foam.  The brick mould of the door will sit against the exterior of the wall.  The ganged 2x4s which define the opening will allow the door to open a little further than that of a 2x8 wall.    With the door details finalized, I had to flash the opening as per the plan.  I specified the size/shape for aluminum sill pans and CBS Eavestroughing made them for me.  The sill pans have a kind of end dam to prevent water from entering under the under the stud opening should the door ever...

The Attic: A hatchway, A Landing and a Catwalk.

  Attics are one of the neglected spaces in the our homes....an afterthought really.  Many trusses are designed the same way they were years ago.  There is no thought put into the lack of insulation above the top plate on exterior walls.  Heeled trusses were developed as a solution to this problem (https://www.apawood.org/raised-heel-trusses).  Adding a small heel enables deeper insulation over the top plate of exterior walls and helps prevent thermal short circuiting to and from the attic space.   It seems that heel trusses may become a mainstay for the future since new code changes now required attics to be a minimum of R50.  Large heels mean more blocking and higher baffles to combat the effects of wind washing on the thermal effectiveness of the attic insulation.  The key here is to direct any wind (entering the attic through the soffit) far above the layer of insulation.  The air contained in the insulation remains stagnant which ...

OSB, OSB, everywhere...

In the previous post we were installing the OSB air barrier on the 2x8 stud walls.  The drawing specifies that OSB be installed on the interior of the 2x8 stud wall. Once all joins are caulked with acoustical sealant and then taped, the OSB will act as an air barrier and will also serve as a vapour retarder. Before attempting to install OSB on the ceilings we narrowed down our game plan.  We quickly decided that lifting heavy sheets and attaching them to the ceiling using muscle power and a dead man support was out of the question.  Our local Princess Auto had a drywall lift on sale so we bought it.  We started in one corner of the building.   One person on a ladder guiding the other where to push the drywall lift loaded with a sheet of OSB worked great.  Our first sheet was cut so that the edge of the sheet could be nailed under the underside of the truss.  Using a framing nailer armed with 2 3  /8" nails was the way to go for attaching the she...