After the subterranean heating and cooling system was installed, back filled and lightly tamped it was time to place the various services. Services!?!?!?! What kind of "Services!?!?!?" could a greenhouse possibly need?!?! Keep in mind that this is not just a greenhouse. It is a four season greenhouse. It has potential to grow for three seasons of the year and maintain living plants in dormancy through December and January or has potential to provide a growing environment year around with a heat source. Before starting this building I had to think a bit about what a greenhouse needed to function. These are some basic necessities for a greenhouse (This is by no means an exhaustive list):
1. Ventilation. A source or several sources of ventilation are necessary. A greenhouse is a high humidity environment with potential for large temperature swings. Watering plants will lead to moisture in the air through evaporation from the soil and transpiration through the plants. The air-tightness requirement in order to make it energy efficient will make the inside like a jungle in the summer and like a fog bank in the winter; both inhospitable long term environments for most plants and detrimental to the structure since moisture can lead to significant mould issues. Humidity can be dealt with in several ways. First, when the SHCS is running, humidity from plant transpiration will enter the ground duct system with moving air. As that air cools it will lead to condensation. This phase transition deposits a large amount of energy in the ground that can be pulled from the ground later in order to keep the greenhouse from freezing. The air exits the system back into the greenhouse at a lower relative humidity then when it first entered. Users of such systems have reported that their greenhouse humidity can be controlled quite nicely with a system like this. The SHCS is mostly a closed system and doesn't really introduce any new air into the greenhouse but can condition the air both in summer and winter. Plants also need a source of carbon dioxide and we need a way to further condition the air if further humidity control is necessary. So we need a source of new air. Introducing a source of fresh air in the summer is no problem. If the SHCS is unable to meet the cooling demand from all of the solar gain, several gable vents and a window in the greenhouse door can be opened to allow for cross ventilation. Our wind direction is typically south-west at my location so the greenhouse is oriented pretty good for cross ventilation. Winter is a problem. Cold air needs conditioning. Ventilating the space with -10 C air will freeze the greenhouse interior pretty quickly on cold days when the sky is filled with densely packed clouds. I have estimated that we will need about 16 CFM (0.5 air changes per hour eg 0.5 ACH) in order to maintain a healthy environment. Based on the average temperature through our winters, 16 CFM of cold ventilation air will chew up about 2 kWh per day in heating costs in order to maintain about 5 C. This is also a good indicator of why air-tightness is important. Cold air blowing through a leaky structure can lead to significant heating costs. At a base temperature of 5 C, the greenhouse will experience about 1300 HDD (heating degree days). This is significant and deserves some attention. Even a well constructed building could experience 3 air changes per hour (ACH) during windy conditions. At this air exchange rate, a greenhouse of this size could consume almost 3000 kWh in energy per heating season just heating the infiltrated cold air. This doesn't include conductive, radiative and convective losses through the greenhouse envelope which will also be significant. Heating cold air alone in a leaky structure will cost about an extra $100 per month during the 4 coldest months in winter....and will cost even more once you take into account losses through the envelope. Would you want to be paying out hundreds of extra dollars during the winter months in electrical bills? I wouldn't! The take home story here is that leaky structures are bad and relying on natural infiltration to take care of ventilation is a bad idea. A controlled ventilation source is, hands down, a winning gamble. So although humidity control is important by introducing fresh air, where that fresh air comes from is important. The SHCS will be much more effective for maintaining above freezing temperatures if it doesn't have to heat air infiltration.
So it is obvious that cold winter air needs conditioning. This is where the earth tube concept comes in. An earth tube is is a ground source heat exchanger that allows for the transport of fresh air underground. It uses a fan in the greenhouse connected to a long tube which meanders through the ground and terminates at the exterior. It has several advantages. In summer, warm humid air enters the system through terminal outside the building, it travels through the cool ground losing sensible (temperature) and latent (humidity) heat to the tube wall. When the air enters the greenhouse, it is partially conditioned (cooled in this case) and mixes with interior air which cools and dehumidifies the inside of the greenhouse. Heat from tube wall is lost to the ground raising the average yearly ground temperature. In the winter, cold air enters the exterior terminal and travels through the earth tube while gaining heat from the ground. The air entering the greenhouse from the earth tube will still be cold but will require much less active heating since it has already gained a significant amount of heat from the ground. Temperature differentials of 25 C can potentially be achieved. However, performance is a function of air speed, tube length, tube material, ground conduction, etc....so I have had to estimate based on publications what will probably work. Based on my estimates I have chosen to lay about 84' of perforated pipe around the foundation at footing level for a total of about 84' of pipe. There will be two parallel runs. They will terminate in a vertical pipe with some sort of screened hood on the south east side of the greenhouse. Eventually I will build a 4x8 solar screen collector to further condition the winter air with heat before entering the earth tube system.
2. Electrical. I would argue that most greenhouses do not actually need an electrical service. An extension cord would be enough to run power during that time of year that you need to run heating mats. Fans wouldn't be necessary if there are enough vent openings. However, the rule of thumb for ventilation openings required for passive ventilation is 20%-40% of the glazing area. That is a lot of area! Every hole/vent/penetration is a potential weak point in the envelope in terms of air leakage so minimizing penetrations is a necessity. The fan system for the SHCS and the air intake will be operating on thermostats and will need a constant power source. Could the structure be ran off-grid? Sure it could but at a significant cost. Just to put in in perspective, 1000 kWh per year would require about 4 solar panels, a set of deep cycle batteries, and ideally a separate heat source since electric heaters would quickly drain those batteries rendering them useless. It would literally cost thousands to run this off grid. The grid connected option in this case is more cost effective and more resilient and I don't have to maintain the power source. With a grid connected system, NL power will take care of upkeep!
3. Water Source. It is unfortunate but this is not really an option. I would love to run plumbing from my house but it is simply not an option. This being said, getting water to the greenhouse is not a problem anyways. I can run a hose to fill a couple of barrels. In the winter, plants use less water because they transpire less. They say that watering once per week is probably sufficient. This being said, water barrels are a good idea anyway. It will add to the thermal mass of the building. Passive solar greenhouse design suggests that one typically have 2-3 gallons of water as thermal mass per square foot of glazing. At my current estimate of 200 sq. ft. of glazing, we would require about 600 gallons (2271 liters) of water! This is a lot of water and a lot of barrels at a significant cost. My estimate shows it could cost as much as $600 to source barrels! This is assuming I want to know what was originally in them. It is likely that the structure we are building won't actually need this much because the foundation is concrete. IN which case, a couple of water barrels will provide the water I need. The specific heat of concrete is about 1/4 of the specific heat of water so it is not as effective at storing heat as water but what we loose in heat capacity we gain in the mass of concrete. 600 gallons of water weighs in at about 2271 kg. In order to have the same thermal mass, we would need about 9000 kg of concrete. Luckily, the concrete at the back wall alone will weigh in at about 4900 kg and the rest of the concrete walls will bring it above the 9000 kg mark. Long story short, we wont really require any water barrels at all for thermal mass. The concrete will do just fine as long as it is all inside the thermal envelope. Along with an operational SHCS there shouldn't be any real issues with overheating.
4. Good Solar Exposure. An insulated greenhouse with glazing on one side only works well if the sun is able to shine through it like a solar collector. In our hemisphere that means most glazings should be oriented directly towards the south. Glazings on other elevations (east, west, north) can be installed as long as you understand that they will just loose heat with no real net gain in solar energy. The angle of the glazing plays some role in the efficiency of the glazing as a solar collector. The transmission of solar energy is higher for perpendicularly incident sunlight. This can vary widely and, in fact, even at an angle of incidence of as low as 45 degrees, the transmission through polycarbonate is still almost 95% when compared to the perpendicular transmission. Likewise orientation of the long axis of the greenhouse will also affect performance. Much like a solar collector, the orientation of the long axis can vary up to 15 degrees off true south before any noticible change in performance. This is good because often the site will dictate how much leeway you have in orientation.
Bringing it All Together
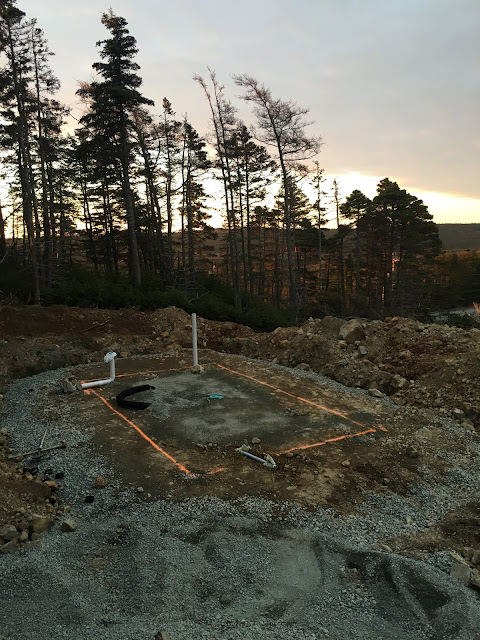
Based on my site, I was able to stay within 12 degrees of true south. This is a good orientation. Marking proceeded by defining the initial north west corner of the greenhouse. I drove a 6" spike into the ground and marked it with orange marker paint. From there I used a compass (an iPhone!) attached to a long straight stick to define the 12 degree south of east direction for the north wall (20') of the greenhouse. I measured 20' and drove another spike into the ground. The south east and south west markers are now pretty simple. On a 12x20 structure the diagonal is about 23'4". I placed a long tape along a diagonal attached at a corner pin, and placed another tape measuring 12' at another corner pin. I stacked the tape measures on top of one another and then moved both around until the 23'4" mark aligned with the 12' mark on each tape measure respectively. I then drove a spike in the ground at that location then did the same with the final pin. I did a second check against all dimensions and then strung a line between all the spikes and marked the border with marker paint picture 1. Picture 1 also shows a 2" grey pvc electrical conduit that will house 10-3 wire for a 30 amp panel (end covered in plastic protruding through the bottom of the footing), the ventilation intake (black hose on the ground) for the SHCS, the SHCS exit vent (white vertical vent right), and the air intake for the earth tubes (white vertical pipe left). These were covered with plastic bags and taped around to prevent concrete or rocks from being caught inside the pipes.
Todd Brenton poured the footing. Todd has done work for me before (both my house and cellar) and he is quick and reliable. He completed the footing within a couple of hours and placed the rebar according to my drawings so the foundation would make a physical connection to the footing (Picture 2). The footings need several days to set. We will be pouring the foundation next Wednesday!

3. Water Source. It is unfortunate but this is not really an option. I would love to run plumbing from my house but it is simply not an option. This being said, getting water to the greenhouse is not a problem anyways. I can run a hose to fill a couple of barrels. In the winter, plants use less water because they transpire less. They say that watering once per week is probably sufficient. This being said, water barrels are a good idea anyway. It will add to the thermal mass of the building. Passive solar greenhouse design suggests that one typically have 2-3 gallons of water as thermal mass per square foot of glazing. At my current estimate of 200 sq. ft. of glazing, we would require about 600 gallons (2271 liters) of water! This is a lot of water and a lot of barrels at a significant cost. My estimate shows it could cost as much as $600 to source barrels! This is assuming I want to know what was originally in them. It is likely that the structure we are building won't actually need this much because the foundation is concrete. IN which case, a couple of water barrels will provide the water I need. The specific heat of concrete is about 1/4 of the specific heat of water so it is not as effective at storing heat as water but what we loose in heat capacity we gain in the mass of concrete. 600 gallons of water weighs in at about 2271 kg. In order to have the same thermal mass, we would need about 9000 kg of concrete. Luckily, the concrete at the back wall alone will weigh in at about 4900 kg and the rest of the concrete walls will bring it above the 9000 kg mark. Long story short, we wont really require any water barrels at all for thermal mass. The concrete will do just fine as long as it is all inside the thermal envelope. Along with an operational SHCS there shouldn't be any real issues with overheating.
4. Good Solar Exposure. An insulated greenhouse with glazing on one side only works well if the sun is able to shine through it like a solar collector. In our hemisphere that means most glazings should be oriented directly towards the south. Glazings on other elevations (east, west, north) can be installed as long as you understand that they will just loose heat with no real net gain in solar energy. The angle of the glazing plays some role in the efficiency of the glazing as a solar collector. The transmission of solar energy is higher for perpendicularly incident sunlight. This can vary widely and, in fact, even at an angle of incidence of as low as 45 degrees, the transmission through polycarbonate is still almost 95% when compared to the perpendicular transmission. Likewise orientation of the long axis of the greenhouse will also affect performance. Much like a solar collector, the orientation of the long axis can vary up to 15 degrees off true south before any noticible change in performance. This is good because often the site will dictate how much leeway you have in orientation.
Bringing it All Together
Based on my site, I was able to stay within 12 degrees of true south. This is a good orientation. Marking proceeded by defining the initial north west corner of the greenhouse. I drove a 6" spike into the ground and marked it with orange marker paint. From there I used a compass (an iPhone!) attached to a long straight stick to define the 12 degree south of east direction for the north wall (20') of the greenhouse. I measured 20' and drove another spike into the ground. The south east and south west markers are now pretty simple. On a 12x20 structure the diagonal is about 23'4". I placed a long tape along a diagonal attached at a corner pin, and placed another tape measuring 12' at another corner pin. I stacked the tape measures on top of one another and then moved both around until the 23'4" mark aligned with the 12' mark on each tape measure respectively. I then drove a spike in the ground at that location then did the same with the final pin. I did a second check against all dimensions and then strung a line between all the spikes and marked the border with marker paint picture 1. Picture 1 also shows a 2" grey pvc electrical conduit that will house 10-3 wire for a 30 amp panel (end covered in plastic protruding through the bottom of the footing), the ventilation intake (black hose on the ground) for the SHCS, the SHCS exit vent (white vertical vent right), and the air intake for the earth tubes (white vertical pipe left). These were covered with plastic bags and taped around to prevent concrete or rocks from being caught inside the pipes.
Todd Brenton poured the footing. Todd has done work for me before (both my house and cellar) and he is quick and reliable. He completed the footing within a couple of hours and placed the rebar according to my drawings so the foundation would make a physical connection to the footing (Picture 2). The footings need several days to set. We will be pouring the foundation next Wednesday!
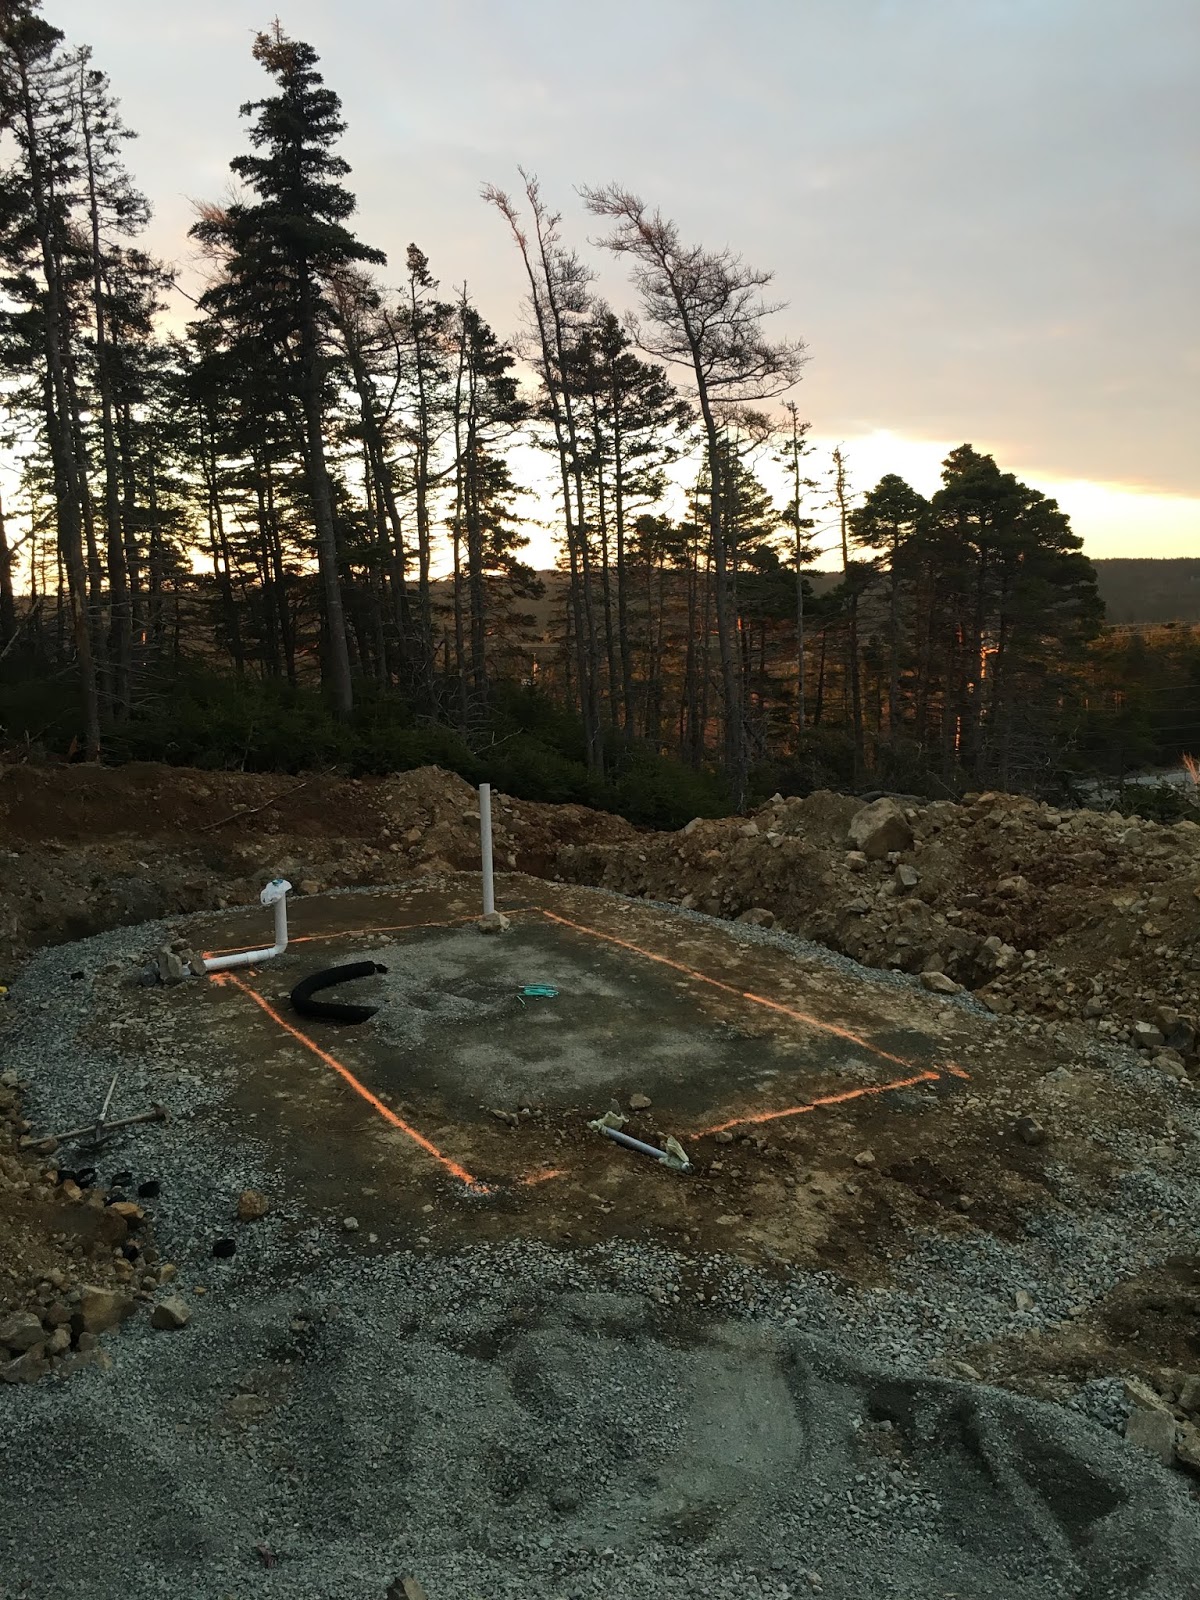
Picture 1. Ready for footings. 6" spikes mark the foundation
corners and the painted line represents the greenhouse footprint.
Ventilation pipes and electrical conduit are in place and ready for the pour.

Picture 2. Footings poured with the forms still intact.
Hi David, I first came across your work on the GBA website. Currently, I am exploring earth tubes for my 34 x 96 foot greenhouse in Central PA. We are a certified organic commercial farm. Propane crushed us last year. We have 5 traditional greenhouses (3 heated). For the sixth, I am very curious about an earth tube, I only want partial heating. It looks like you did 168 total length of pipe (84 foot, parallel runs). What was the diameter of the pipe? What was the type of pipe? I've read PVC is OK, I've also read elsewhere to use silver nitrate infused high density polyethylene. What sort of fan did you use, what was the rate of air intake through the pipe into the greenhouse? Did you lay your pipe at an angle, was it perforated? Concerned about mold, great way to introduce disease to the plants. Did you just backfill with soil? If you have any spare time, our humble farm would appreciate any lessons learned. ethan@strongrootsorganicfarm.com
ReplyDeletesorry for the late reply. I dont check this site often. the diameter of the parallel runs was 4" and was perforated drain pipe. The fan I used was a tjernlund m6. Its a pretty good fan. I measured the intake at one point but can't remember what it was. There another fan of the same size that evacuated air from the greenhouse. Both are on the same thermostat. I backfilled with a fines from a crusher so water would drain from the pipes. seems to be fine and haven't had any mould or disease issues in the greenhouse. All pipes for the gaht and intakes were perforated weeping tile pipe. Hope this helps!
Delete