Now that I have had time to assess what was left by the first siding contractor, I have found many issues. Some had to be fixed, others will never be noticed and none of the issues will be detrimental to the building, so I opted to save materials rather than waste them. The project basically halted for about 6 weeks with the exception of a few interior things.
Things are moving quickly now that Keocan General Contracting Inc. are on site. They have completed about 75% of the siding and are now working on completing the remainder of the soffit and fascia amongst other things. This is the good news. The bad news can be seen in Photo 1-1. The previous siding company installed the siding courses at odd intervals. I specified 4 1/2" but they are all over the place. This being said the install looked fine since 1/8" here an there isn't really noticible. However, I knew moving forward that carrying these errors around the whole building would be impossible. Pat and his crew used an L shaped wooden jig to set a 4 1/2" spacing on all courses. Because of the compounding differences with the other installers method, the courses ran off higher up the building. About 9' up the building the courses around the corner are off by almost 2". I was left with three options. Option 1: Leave it!...I would have to live with this for some time so figured it was a bad option. Its so horribly noticeable that another option had to be considered. Option 2: Pat and his crew removes and replaces all the siding. This was a good option since it would fix the issue but there were two problems. The first is that it would slow them down, the second is my budget being blown on fixing issues related to the previous contractor. Option 3. Do it myself! So thats what I did!
I determined up front that the first 6-8 courses looked OK. They matched up with the courses on both the west and east sides of the building. So I removed about 20 courses of siding across about 75 feet of frontage. As I removed a course, I laid all the pieces on the ground so that they could be re-installed in the same order in which they were removed. A short scaffold, a flat bar and a hammer were really all that was needed. Surprisingly, the galvanized coil nails that were used to install the siding were easy to pry out. I would pull the siding away from the strapping at the top, insert the flatbar and give it a good bang towards the building...and POP! That is all there was to it. Well, not quite. Most pieces were easy to remove, while some were stubborn enough that they would split under pressure and had to be replaced with new pieces. Other pieces were so bad looking that I just had to cut them myself. One of the cuts around the window looked like it had been cut with a steak knife (Photo 1-2). It wasn't stained either. I'm not sure what plan the previous contractor had for staining that cut after the fact without getting stain all over the head flashing. Photo 1-3 shows the cut corrected by me. Luckily there is lots of short scrap onsite so I had lots of material to choose from. The next day was a early start. It is still dark at 7 am so the best I could do was set up for the day. I started in around 7:40 am installing the siding removed from the evening before. A friend of mine came by around 8:15. By 2 pm we had the garage completed Photo 1-4. I started removing the front and had it mostly completed by 6 pm that night, just in time for darkness.
The next day I worked through 12 hours and several hours throughout this week to complete the job. Photo 1-4 shows several courses of siding missing just under the overhang. I finished up those in a couple of hours and took a picture of the completed job (Photo 1-5). This job leads to an interesting story. At one point, the previous contractor told me to pick up alot of cedar shims because he was going to need them. He said that the foam walls were so wavy that the would need them to straighten everything out. I picked up 10 packs of shims. During a heated argument towards end of our business together he was complaining about how hard it was to make the siding under the front overhang look "good" and how many shims he had to use to do so. He also talked about charging more money because of all the effort required. Personally I think that he was working with an inexperienced crew and was trying to find a way to upcharge in order to compensate for time/money lost. Anyway, there were only about 4 packs of shims left when he vacated the worksite for good. I figured that I would be seeing shims drop out from under the siding as I was removing it. Much to my surprise....well maybe not....there wasn't a shim to be seen! I removed about 6 squares of siding and there were no shims at all: Not even one! I do wonder what happened with the shims.
Photo 1-6 shows the fascia being installed. Most Newfoundland homes have what is locally refered to as a felt mould which runs up the fascia board. Its a 1"x3" strap that runs just under the shingle and gives the eave more dimensionality than a just a flat fascia. Additionally, everbody has their fascia bent onsite. Instead I opted for something less traditional looking and something that I could purchase locally in a store. Our local Kent store stocks a 8" ribbed pre-bent aluminum fascia. It seemed much more convenient than getting somebody to bend the fascia and looks a little less traditional (Photo 1-7)


Photo 1-2 Check out the cut over the end dam flashing on this window. Caulking this would have left a huge mess.


Photo 1-7. Pre-bent fascia obtained from the local Kent building supply. The fascia has a ribbed profile.
Things are moving quickly now that Keocan General Contracting Inc. are on site. They have completed about 75% of the siding and are now working on completing the remainder of the soffit and fascia amongst other things. This is the good news. The bad news can be seen in Photo 1-1. The previous siding company installed the siding courses at odd intervals. I specified 4 1/2" but they are all over the place. This being said the install looked fine since 1/8" here an there isn't really noticible. However, I knew moving forward that carrying these errors around the whole building would be impossible. Pat and his crew used an L shaped wooden jig to set a 4 1/2" spacing on all courses. Because of the compounding differences with the other installers method, the courses ran off higher up the building. About 9' up the building the courses around the corner are off by almost 2". I was left with three options. Option 1: Leave it!...I would have to live with this for some time so figured it was a bad option. Its so horribly noticeable that another option had to be considered. Option 2: Pat and his crew removes and replaces all the siding. This was a good option since it would fix the issue but there were two problems. The first is that it would slow them down, the second is my budget being blown on fixing issues related to the previous contractor. Option 3. Do it myself! So thats what I did!
I determined up front that the first 6-8 courses looked OK. They matched up with the courses on both the west and east sides of the building. So I removed about 20 courses of siding across about 75 feet of frontage. As I removed a course, I laid all the pieces on the ground so that they could be re-installed in the same order in which they were removed. A short scaffold, a flat bar and a hammer were really all that was needed. Surprisingly, the galvanized coil nails that were used to install the siding were easy to pry out. I would pull the siding away from the strapping at the top, insert the flatbar and give it a good bang towards the building...and POP! That is all there was to it. Well, not quite. Most pieces were easy to remove, while some were stubborn enough that they would split under pressure and had to be replaced with new pieces. Other pieces were so bad looking that I just had to cut them myself. One of the cuts around the window looked like it had been cut with a steak knife (Photo 1-2). It wasn't stained either. I'm not sure what plan the previous contractor had for staining that cut after the fact without getting stain all over the head flashing. Photo 1-3 shows the cut corrected by me. Luckily there is lots of short scrap onsite so I had lots of material to choose from. The next day was a early start. It is still dark at 7 am so the best I could do was set up for the day. I started in around 7:40 am installing the siding removed from the evening before. A friend of mine came by around 8:15. By 2 pm we had the garage completed Photo 1-4. I started removing the front and had it mostly completed by 6 pm that night, just in time for darkness.
The next day I worked through 12 hours and several hours throughout this week to complete the job. Photo 1-4 shows several courses of siding missing just under the overhang. I finished up those in a couple of hours and took a picture of the completed job (Photo 1-5). This job leads to an interesting story. At one point, the previous contractor told me to pick up alot of cedar shims because he was going to need them. He said that the foam walls were so wavy that the would need them to straighten everything out. I picked up 10 packs of shims. During a heated argument towards end of our business together he was complaining about how hard it was to make the siding under the front overhang look "good" and how many shims he had to use to do so. He also talked about charging more money because of all the effort required. Personally I think that he was working with an inexperienced crew and was trying to find a way to upcharge in order to compensate for time/money lost. Anyway, there were only about 4 packs of shims left when he vacated the worksite for good. I figured that I would be seeing shims drop out from under the siding as I was removing it. Much to my surprise....well maybe not....there wasn't a shim to be seen! I removed about 6 squares of siding and there were no shims at all: Not even one! I do wonder what happened with the shims.
Photo 1-6 shows the fascia being installed. Most Newfoundland homes have what is locally refered to as a felt mould which runs up the fascia board. Its a 1"x3" strap that runs just under the shingle and gives the eave more dimensionality than a just a flat fascia. Additionally, everbody has their fascia bent onsite. Instead I opted for something less traditional looking and something that I could purchase locally in a store. Our local Kent store stocks a 8" ribbed pre-bent aluminum fascia. It seemed much more convenient than getting somebody to bend the fascia and looks a little less traditional (Photo 1-7)

Photo 1-1. Look closely and you will notice the courses on the side wall are not aligned to the front.

Photo 1-2 Check out the cut over the end dam flashing on this window. Caulking this would have left a huge mess.

Photo 1-3 After correction, the cut looks nice and smooth...the way it should be. Just needs a small bead of caulk to finish it off.

Photo 1-4. Garage siding removed and replaced.

Photo 1-4. Only two or three courses left to re-install!!!
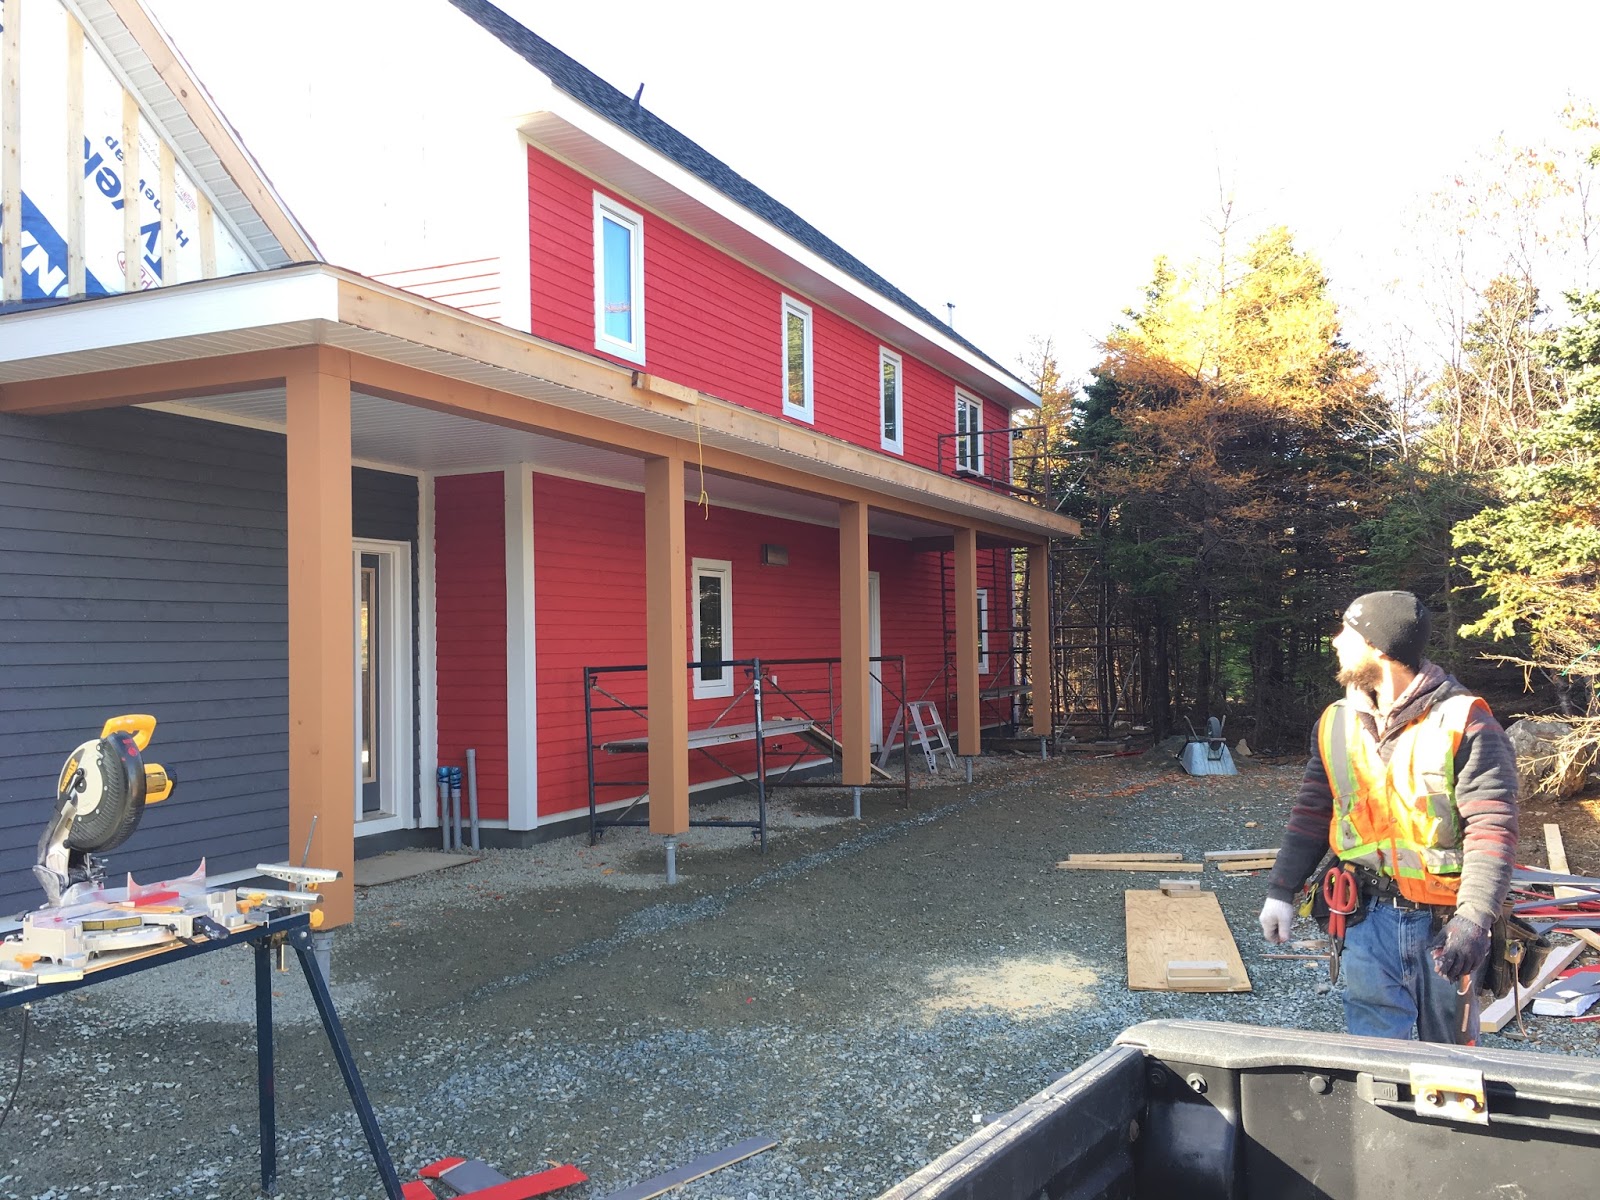
Photo 1-5 Garage, porch and house siding re-installed. Done!

Photo 1-6 Garage, porch and house siding re-installed. Done!

Photo 1-7. Pre-bent fascia obtained from the local Kent building supply. The fascia has a ribbed profile.
hi David,
ReplyDeleteDo you have any pictures or details around installing the window trim? Looks like there is a drip cap over the trim as well as the window.
Steve, check your gmail account, I sent you an email to the address you provided me several months ago.
Delete