In the previous post we were installing the OSB air barrier on the 2x8 stud walls. The drawing specifies that OSB be installed on the interior of the 2x8 stud wall. Once all joins are caulked with acoustical sealant and then taped, the OSB will act as an air barrier and will also serve as a vapour retarder.
Before attempting to install OSB on the ceilings we narrowed down our game plan. We quickly decided that lifting heavy sheets and attaching them to the ceiling using muscle power and a dead man support was out of the question. Our local Princess Auto had a drywall lift on sale so we bought it. We started in one corner of the building. One person on a ladder guiding the other where to push the drywall lift loaded with a sheet of OSB worked great. Our first sheet was cut so that the edge of the sheet could be nailed under the underside of the truss. Using a framing nailer armed with 2 3 /8" nails was the way to go for attaching the sheets. A hammer and nails was just frustrating. The second run of OSB was offset so the joins were staggered. There were 42 sheets of OSB all together which took about 8 hours for us to complete the ceiling.
After the ceiling was complete the next task was to install the OSB on the walls. Luckily we already had a plan in place for this because we had already completed the install on the main level. The batt insulation had already been installed upstairs so all we had to do is start at one corner and install the sheet goods one at a time. The trick for installation was to angle the bottom of the sheet against the bottom wall plate, wedge it with your foot and use hand force to compress the insulation while pushing the OSB in place. Nailing initially (with a framing nailer) at the plate holds the sheet in place. Working our way across and up the sheet with nails at 24" oc completed the job. If we overlapped with a window we found that scribing around windows and then cutting to fit worked best.
After sheeting was done it was time to start air sealing the OSB seams. I illustrated this earlier in my blog. Simply caulk the seam with a 1/4" bead of acoustical sealant and then roll 3M 8067 tape on top. After rolling the tape I used a J-roller to apply pressure to the tape and the bead of acoustical sealant. This flattens the acoustical sealant and pushes it into the seam. The walls were completed using the same procedure.
Corners....those darn corners! They are a real pain to work with. 3M tape is too floppy to work with in a corner. Blueskin on the other hand is pretty easy in comparison. The corner was first primed with Bakor Hi Tac Primer. To make an inside corner I simply cut a square of Blueskin, and ran a half cut through the centre. After a simple fold it was ready for install! (Photos1-4 to 1-9).
There was an interesting conundrum with the upstairs wall. The OSB is attached to the bottom side of the trusses. The OSB is then strapped with 2x4 and drywall will be attached. In order for the ceiling to be the right height for drywall and to allow for about 1/2" play at the bottom, the exterior wall had to be about 99 1/8" high. This height is not standard. Because of this, a single sheet of OSB wasn't high enough to reach to the top of the wall. We had to add a 3" strip all the way around the top of the 2x8 wall. This lead to a minor problem; How to seal the upper corner of the wall with Blueskin? My plan was to run the blueskin 4" down the wall and 2" onto the ceiling. This would effectively cover two joins at the one time (Photo 1-12 top of wall)
Blueskin doesn't have a split paper backing. Using a straightedge, you can score the paper backing if you cut lightly with a utility knife. 3M tape was too hard to work with in the corners. Blueskin is firmer and easier to place. We came up with a two person system that allowed us to lay about 8'-10' at a time. We primed the surface with Bakor Hi Tac Primer before applying the self adhered membrane (Photo 1-10). The key here is to work slow and methodically. Trying to rush leads to a bad install with alot wrinkles and folds. Even working slowly, will lead to some folding. With some experience working with the material, we eventually were able to minimize wrinkling, mainly through careful observation as we were applying the tape. Overall the install went pretty smooth (Photos 1-11 through 1-13)

Photo 1-1. Raising OSB in order to attach it to the ceiling is heavy work. A drywall hoist makes easy work for this heavy task.

Photo 1-2. Ceiling partially completed.

Photo 1-3 Tools of choice for taping details. A battery powered caulk gun is indispensible. Blueskin primer was used to prime wood surfaces before blueskin application.

Photo 1-3 Wall and ceiling taping details complete.

Photo 1-4. Square cut for inside corner

Photo 1-5. Square folded to create a crease

Photo 1-6. Fold one flap upwards

Photo 1-7. Fold to create a inside corner

Photo 1-8. Prime surfaces with Blueskin primer

Photo 1-9. After caulking with acoustical, the corner piece is carefully installed and rolled with a J-roller

Photo 1-10. Priming the floor and wall for blueskin. A bead of acoustical sealant is caulked into the corner before applying blueskin.

Photo 1-11. Blueskin applied to slab. The slab, vapor barrier, and OSB were primed with Bakor primer. The slab edge and the inside corner of the vapor barrier/OSB was caulked with acoustical sealant. Blueskin was then applied. A J-roller was used to apply pressure to the membrane to ensure it adhered to the substrates.

Photo 1-12. Blueskin on inside corners
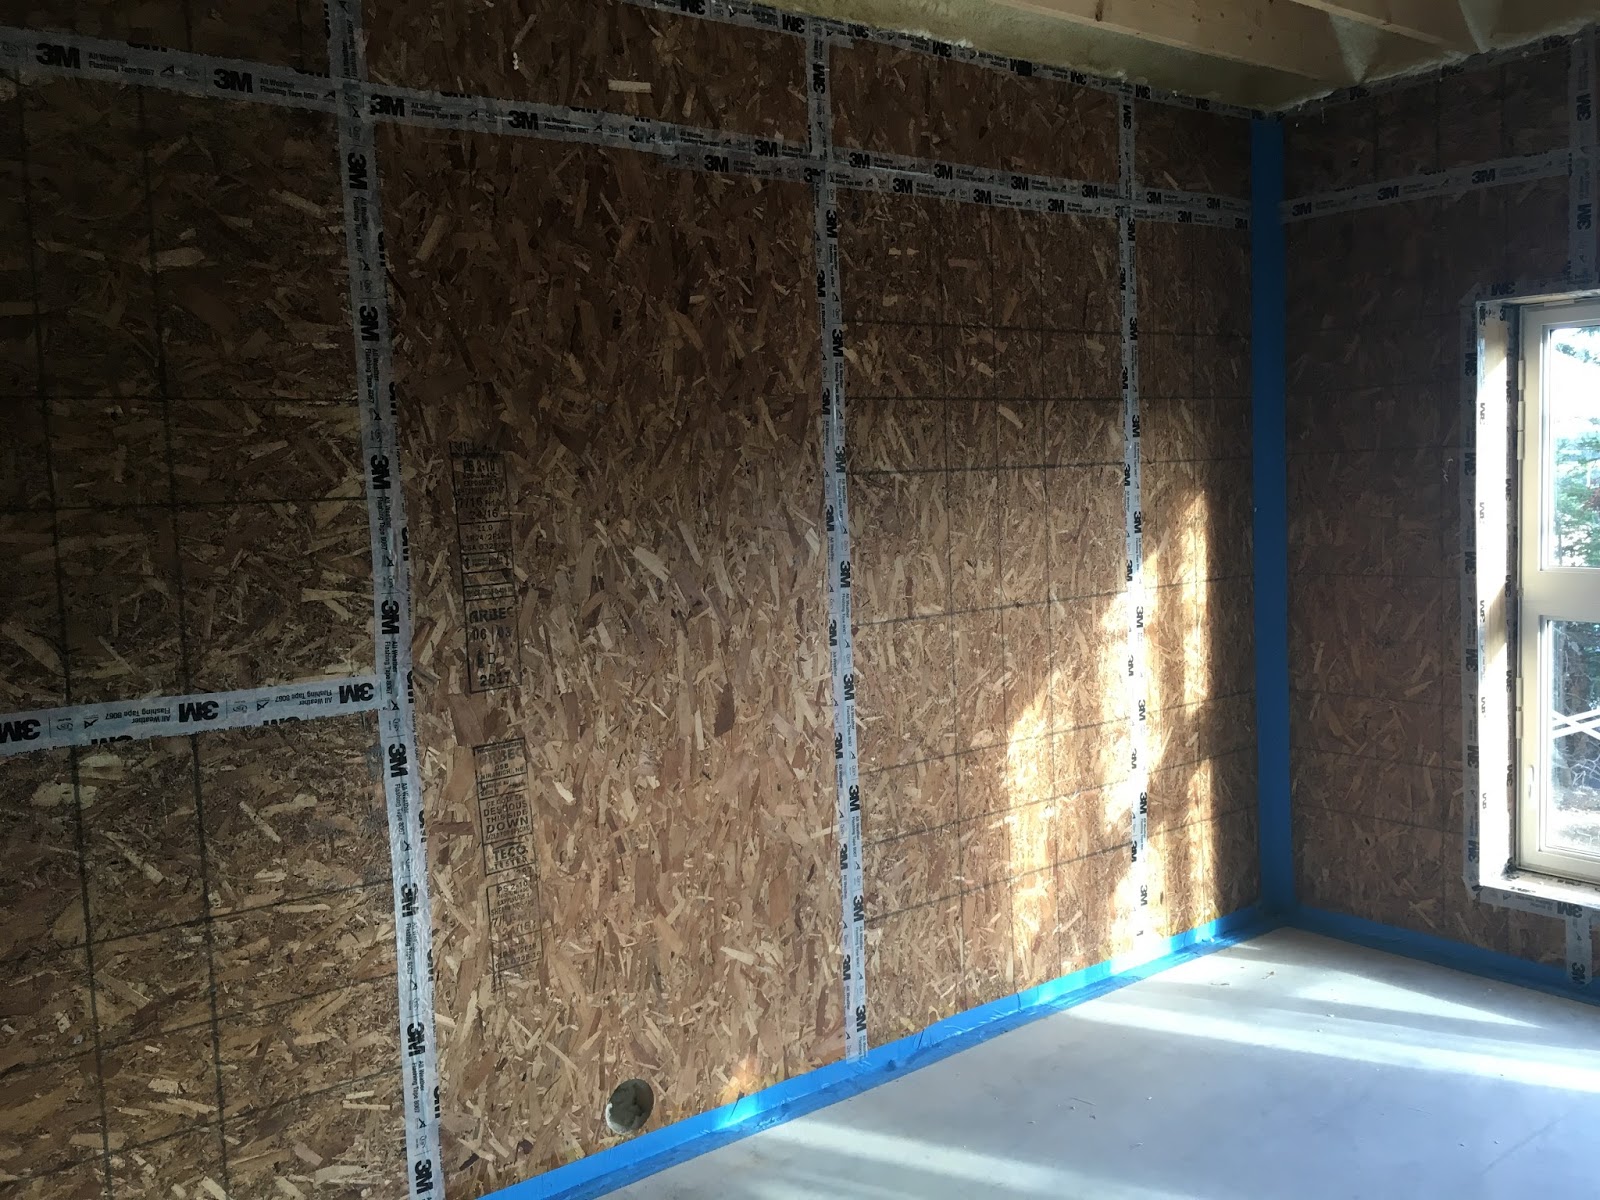
Photo 1-13. Blueskin on inside corners. The hole in the wall is for the stove air intake.
Comments
Post a Comment